

If you've been by the shop lately you may have noticed the cute little fabric bundles we've created to entice you when you're getting your fabric cut or waiting at the register. We call them "teeny packs" and they are so much fun. Five coordinating fabrics, each about the size of a piece of paper, and calorie free to boot! We are constantly thinking up different ideas for these and decided that it's time to turn a few of these ideas into tutorials for you, our fantastic customers!
Our first "teeny pack tutorial" (and our first blog tutorial ever) is for this cute card case with 2 pockets on each side and a simple elastic and button closure. It's a fantastic little wallet for all those cards we seem to accumulate, a great gift to make for friends, and a wonderful use of a teeny pack. You can actually make 2 from one of our packs! The case measures about 3 1/8" x 4 1/8" and holds lots of cards or just a few, you decide!
So let's get started!
Project Supplies:
1 "Teeny Pack"
1/4 yard fusible interfacing (makes 2 cases). We use SF101 by Pellon.
6" piece of 1/8" elastic (or 2 elastic hairbands)
1 button (we prefer a button at least 1/2" in diameter or as large as 1")

Fabric Prep:
- Open up your teeny pack and decide which fabrics you would like to use. Our card case uses a main or outer fabric, a different fabric for the lining, and a third fabric for both pockets. You can be the designer!
- Press each piece.
- From the main/outer fabric, cut 1 - 4 3/4" x 7" rectangle. You can "fussy cut" your piece or cut from one half if you want to make another card case.
- From the lining, cut 1 - 4 3/4" x 7" rectangle.
- From the pocket fabric cut 2 - 4 3/4" x 8 1/2" rectangles.
- From the interfacing cut 2 - 4" x 6 1/4" rectangles (for the main and lining fabrics) and 2 - 4" x 7 3/4" rectangles (for the pockets.)
- Following the manufacturer's directions, fuse the interfacing pieces to each fabric piece.
Sewing:
* Please note, we will use a 1/4" seam allowance throughout this project.
- Measure 2 1/4" down along the 8 1/2" sides of the pocket and mark on both sides. (We will work on one pocket and then you will follow the directions again for the second pocket.)
- Fold fabric, wrong sides together, at the 2 1/4" mark and press.


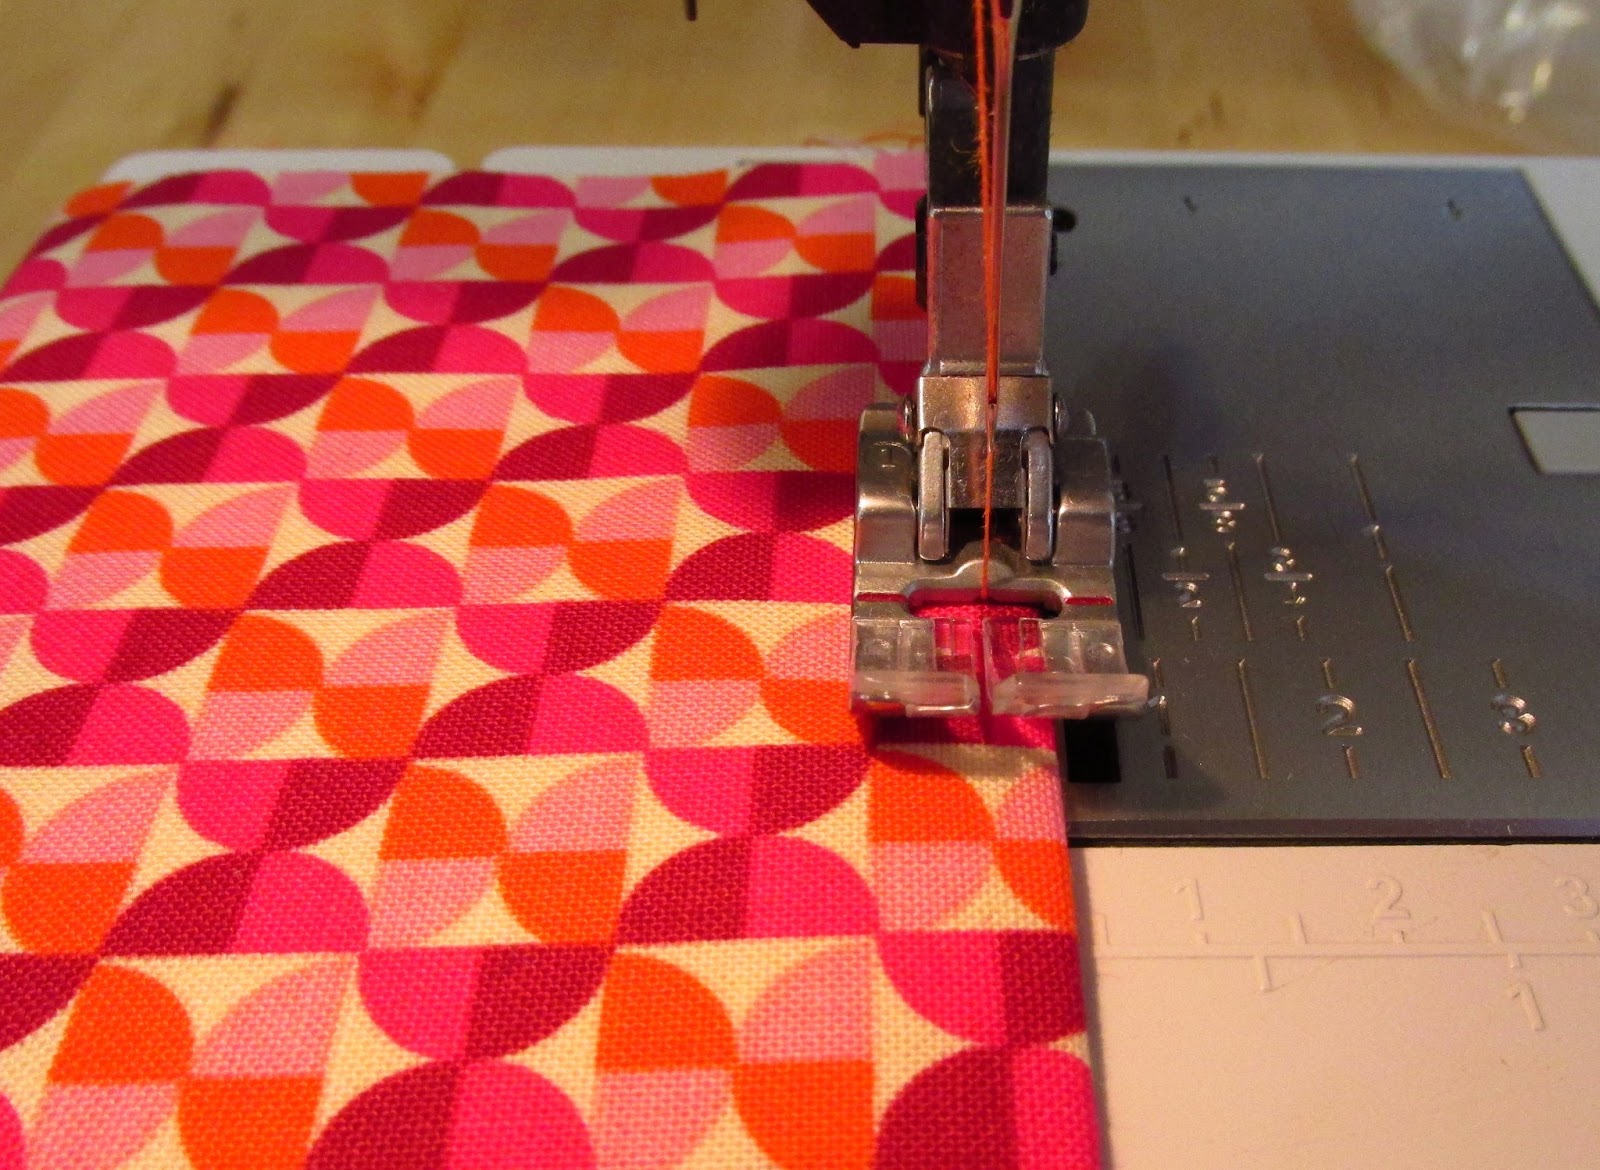
3. Topstitch close to folded edge.

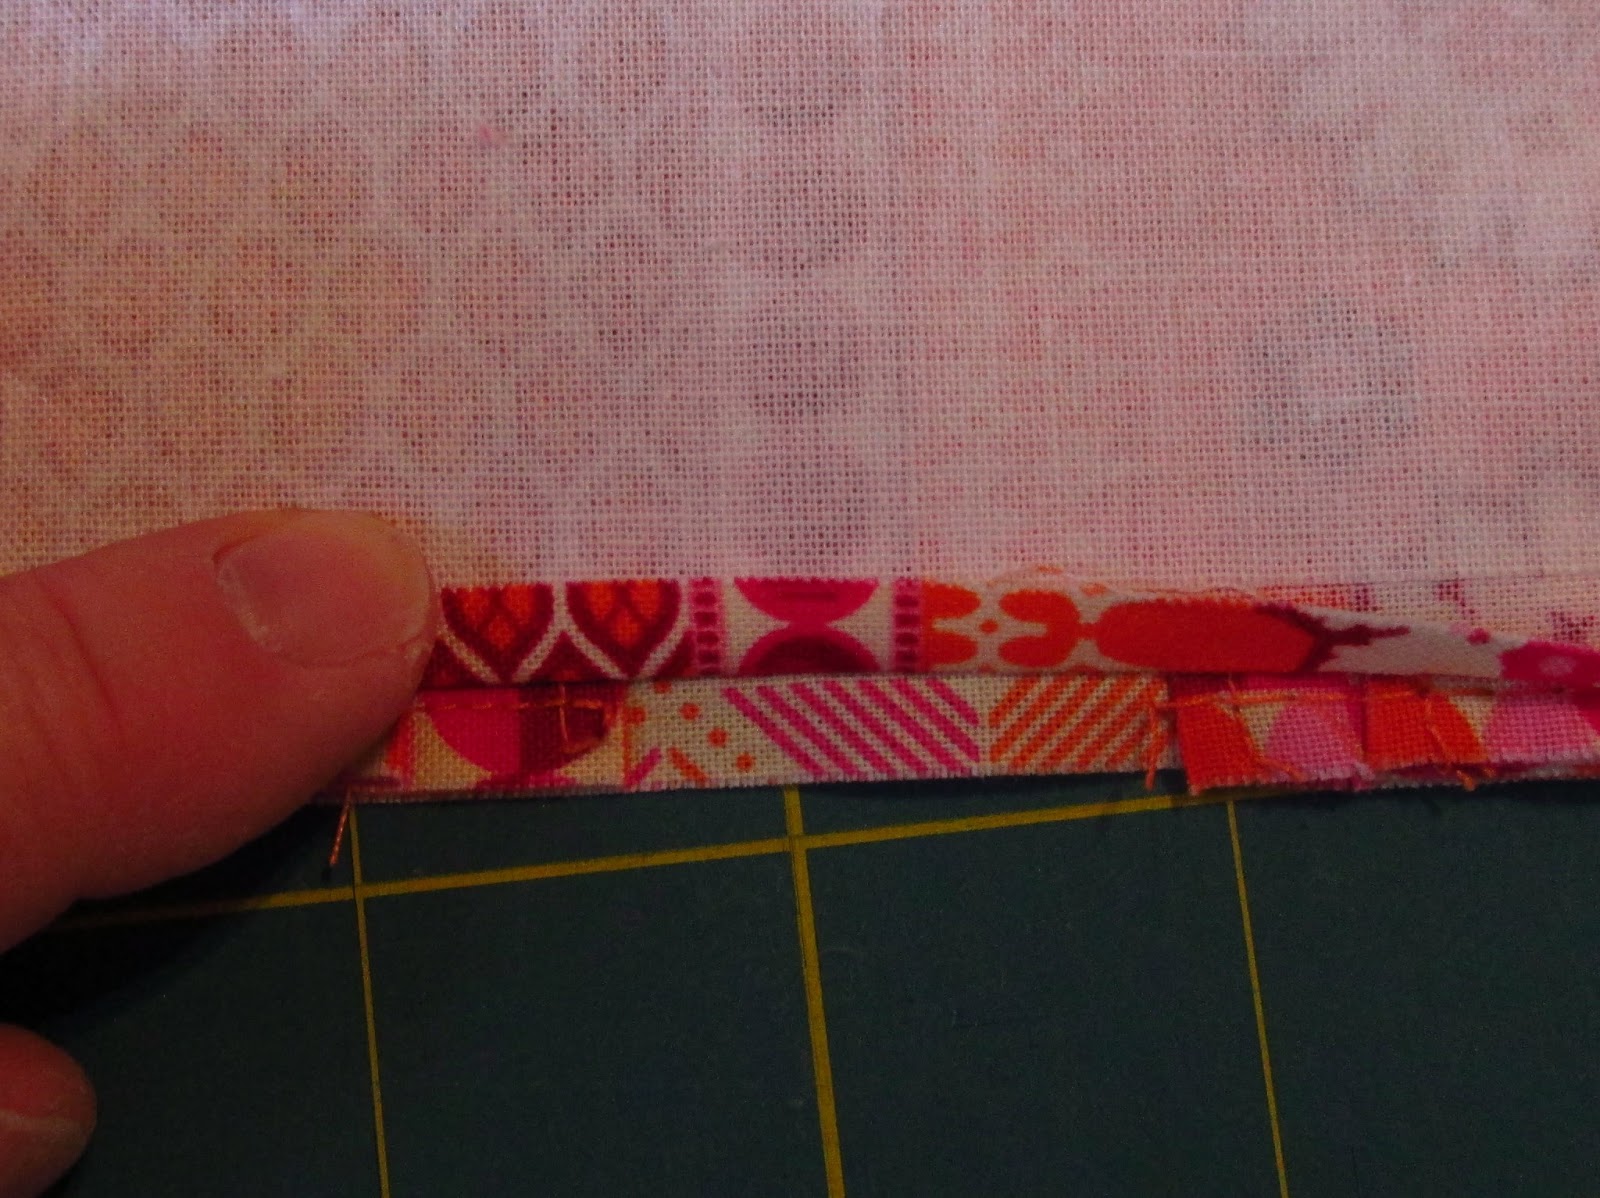
5. Measure down 1 7/8" from the folded edge of the pocket and draw a line from edge to edge with an erasable marking pen or pencil. Lay the pocket on top of the lining, matching the folded edge with the marks on the lining. Pin in place. Stitch across the marked line. (This creates a "bottom" for the card pocket.)

(oops...forgot about getting a manicure!)


(Top and side edges of pocket are not stitched down.)

(Back side of lining and pocket.)


6. Measure up 2 3/8" from the bottom of the pocket and draw a line across it. Fold on the line, wrong sides together and press.

7. Topstitch close to the folded edge. Be careful not to catch the lining while topstitching.

8. Grab hold of the fold that you just topstitched and fold it up toward the first finished edge until the pocket and lining bottom raw edges meet. Pin in place and press.


9. Baste around both sides and the bottom of the pocket piece.

(One side done, one side to go!)


11. Mark the center of one short end (4 3/4" side) of the pocket. Cut your 6" piece of elastic in half. If you are using hair bands use one of the hair bands. Make a loop with the elastic being careful not to twist it and stitch it over the mark, within the 1/4" seam allowance, loop facing the pocket. (If you are using a hair band, pinch into a loop and stitch in the same way. You will have a smaller loop on the raw edge side instead of the 2 cut ends of elastic.)


12. Place your main/outer fabric over your pocket panel right sides together. If you have one side of the outer fabric that you would like to be on the front of your card case, align it with the edge opposite the elastic. Stich both long edges but leave an opening on one side, in the middle about 2 1/2" - 3" long, backstitching at the end and beginning of the opening to lock the stitches in place. This will be the opening for turning the case inside out. (You can also baste across the opening with a longer stitch length, finger press the seam, and then remove the stitches before turning. This may help with getting a nicer edge for topstitching later.)

(basting stitches)


13. Before stitching across the short ends, fold the seam allowances over and pin in place. This will create neat, square corners on your finished case. (I learned this trick years ago watching a sewing show on PBS and can't remember which one. Thanks to the wonderful woman who taught me this!....Did I just date myself or what?)


(clip the corner, but only the SHORT ENDS!)

14. Carefully turn your card case right sides out. Use a blunt tool to ease out the corners. If your corner does not ease out square, you may need to poke it in again and push the seam allowance to the other side. This sounds confusing, but try it! Pin the opening closed. Please note that I have chosen not to discriminate in pin choice. Just remember to only iron/press over the glass headed ones :)

15. Press your card case flat, being careful not to melt your elastic loop!

16. Stitch a fun button to the outside fabric opposite the elastic end. Be careful not to sew the pocket closed!


Hope you enjoyed our first tutorial. See you at the shop!
No comments:
Post a Comment